独立开发者的实战手册:用 Expo、EAS Build 和 OTA Updates 更快发布
Wellspoken 创始人 Liam Du 发现聪明人常因紧张而说不清想法,于是用 Expo 打造了一款日常表达训练应用。
中文
复制
本文是 Liam Du 的客座文章——他是 Wellspoken 的创始人,也是更好沟通的积极倡导者。
…
有一次开会,我试图向团队解释一个产品想法。这个概念在我脑子里很清晰——我反复想过,我知道它说得通——但一开口,话就说错了。我倒回去重讲。再试一次。思路断了。
同事打断我:“我没听懂。”
我又试了一次,换了个说法。还是一团糟。这种情况不断发生,同一场会议里出现了好几次。我能感觉到自己每试一次就更慌,越慌越说不清楚,越说不清楚就越慌。说实话,挺丢人的。
我知道自己想说什么。想法是清楚的。问题出在我的想法和清晰表达的能力之间的那道鸿沟,尤其是在有压力或者紧张的时候。
有一阵子,我以为只有我这样。但后来我到处都能看到这种情况。聪明人,明明很懂自己在说什么,但在对话里就是没法干净利落地讲出来。
于是我找了找能帮上忙的工具。我找到了演讲辅导(贵)、公开演讲课程(解决的是另一个问题),还有专注声音投射或舞台表现力的应用(形式不对)。没有一个能解决我真正需要的:在日常对话中即时组织思路的能力。
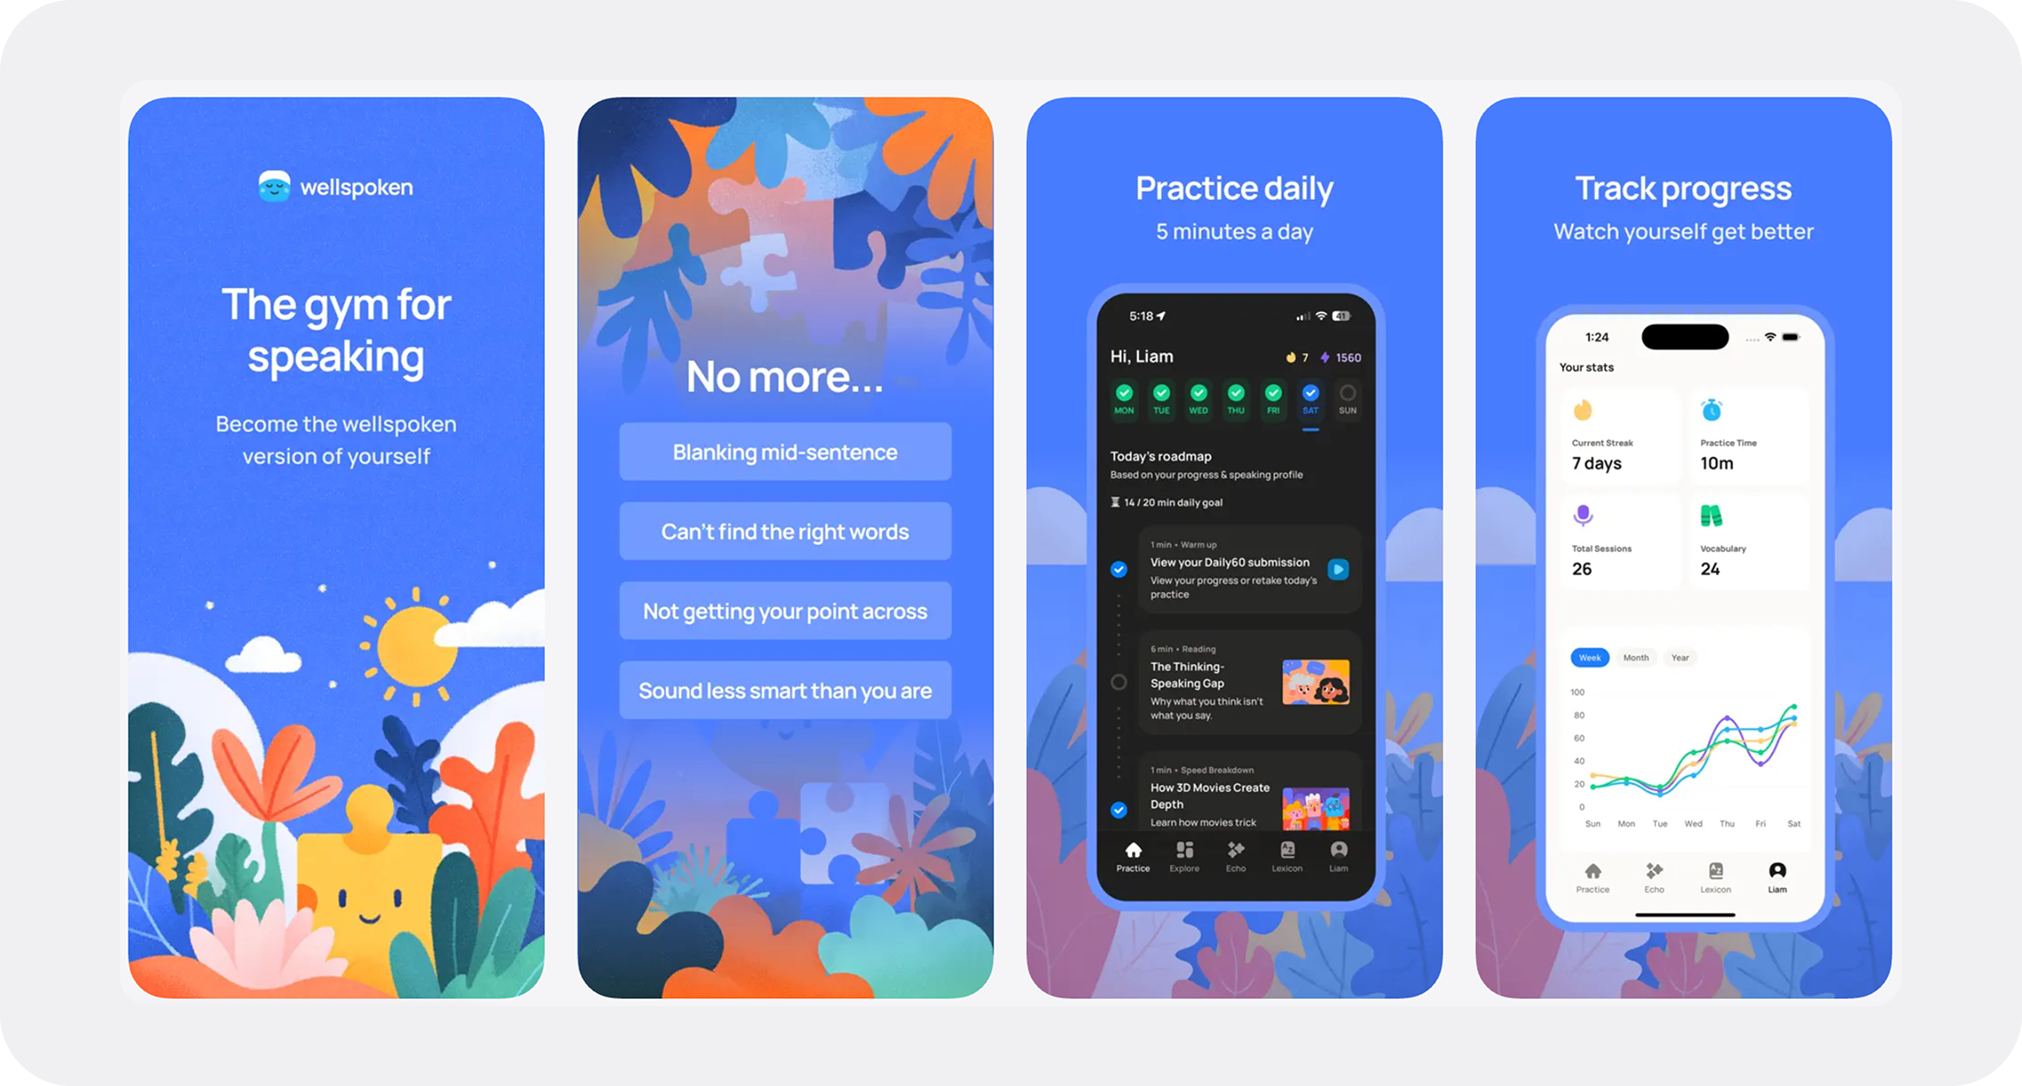
所以我决定做一个应用——一座锻炼表达能力的健身房。每天用碎片化的练习,训练实时组织思路并清晰表达的认知能力。
我给它取名 Wellspoken。
为什么我选择用 Expo 来做这个应用
我给自己一周时间,要在 iOS 和 Android 上同时发布。作为一个人包揽设计和工程的独立开发者,我耗不起在基础设施或平台特定问题上浪费时间。我需要把精力放在做产品本身。Expo 让我做到了这一点:
-
不需要原生开发:Expo SDK 让我不用写 Swift 或 Kotlin 就能用上原生功能。录音、文件系统访问、通知——全都通过干净的 TypeScript API 处理。
-
不用折腾构建配置: EAS Build 包办了所有平台相关的编译。我一次都没打开过 Xcode / Android Studio。
-
不用管证书: 描述文件、签名证书、keystore——EAS 全都自动处理了。我照着命令行的教程走了一遍就完事了。
-
上线后迭代快: OTA 更新 意味着修 bug、推改进都不用等应用商店审核。推一次更新,用户下次重启就能拿到。上线后第一周,这救了我好几次。作为一个时间紧的独立开发者,不用切换到原生开发、不用碰凭据管理,直接决定了我是能发布出去,还是卡在配置地狱里出不来。
Wellspoken 的功能与架构
核心功能:
-
个性化练习(模拟面试、话题讲解、角色扮演场景)
-
AI 语音分析,找出你在哪里走神或卡壳
-
每天 5 分钟练习
-
进度追踪与连续打卡
-
带免费试用的订阅付费墙
技术栈:
-
React Native + Expo SDK 54
-
TypeScript
-
用 Langchain OpenAI API 做语音分析
-
用 Assembly AI 做转写
-
用 RevenueCat 做订阅
-
EAS Build、Update 和 Submit
我是怎么用 Expo 实现的
下面说说我用到的核心 Expo 功能,以及它们如何让 Wellspoken 的开发轻松了很多。
1. expo-audio:录音体验的核心
录音是 Wellspoken 的基础。每种练习模式都需要高质量采集音频,而且我得让它在 iOS 和 Android 上表现一致,还不能写任何原生代码。
expo-audio 用一套干净的 hooks API 就把这件事搞定了:
// components/RecordingButton.tsx
import {
  useAudioRecorder,
  useAudioRecorderState,
  AudioModule,
  RecordingPresets,
  setAudioModeAsync
} from 'expo-audio';
import * as Haptics from 'expo-haptics';

export function RecordingButton() {
  const recorder = useAudioRecorder(RecordingPresets.HIGH_QUALITY);
  const recorderState = useAudioRecorderState(recorder);
  const [hasPermission, setHasPermission] = useState(false);

  async function startRecording() {
    try {
      // Request permissions
      const { status } = await AudioModule.requestRecordingPermissionsAsync();
      if (status !== 'granted') return;

      // Configure audio mode
      await setAudioModeAsync({
        allowsRecording: true,
        playsInSilentMode: true,
      });

      // Prepare and start recording
      await recorder.prepareToRecordAsync();
      recorder.record();

      Haptics.impactAsync(Haptics.ImpactFeedbackStyle.Medium);
    } catch (error) {
      console.error('Failed to start recording:', error);
    }
  }

  async function stopRecording() {
    try {
      await recorder.stop();
      Haptics.notificationAsync(Haptics.NotificationFeedbackType.Success);

      // recorder.uri contains the file path
      const audioUri = recorder.uri;
      // Upload to backend for analysis...
    } catch (error) {
      console.error('Failed to stop recording:', error);
    }
  }

  return (
    <TouchableOpacity
      onPress={recorderState.isRecording ? stopRecording : startRecording}
    >
      <View style={recorderState.isRecording ? styles.recording : styles.idle}>
        {recorderState.isRecording ? <StopIcon /> : <MicrophoneIcon />}
      </View>
    </TouchableOpacity>
  );
}
好在哪:
-
useAudioRecorderhook 管理所有状态 -
RecordingPresets.HIGH_QUALITY处理各平台的编码配置 -
同一份代码在 iOS 和 Android 上都能跑
-
不需要配置原生模块
我在所有练习模式里都用这个 RecordingButton 组件——问答、框架练习、快速拆解、自由发挥。写一次,到处能用。
音频播放同样干净利落:
// components/AudioPlaybackBar.tsx
import { useAudioPlayer, useAudioPlayerStatus } from 'expo-audio';

export function AudioPlaybackBar({ audioUri }: { audioUri: string }) {
  const player = useAudioPlayer(audioUri);
  const status = useAudioPlayerStatus(player);

  function togglePlayback() {
    if (status.playing) {
      player.pause();
    } else {
      player.play();
    }
  }

  return (
    <View>
      <TouchableOpacity onPress={togglePlayback}>
        {status.playing ? <PauseIcon /> : <PlayIcon />}
      </TouchableOpacity>

      <Slider
        value={status.currentTime}
        maximumValue={status.duration}
        onSlidingComplete={(value) => player.seekTo(value)}
      />

      <Text>
        {formatTime(status.currentTime)} / {formatTime(status.duration)}
      </Text>
    </View>
  );
}
useAudioPlayer hook 自动管理播放状态,useAudioPlayerStatus 则实时推送播放进度。
2. expo-camera:每日 60 秒视频练习
Wellspoken 有个功能叫「Daily 60」——用户录一段 60 秒的视频,讲解某个话题。这需要前后摄像头切换、视频录制以及摄像头权限。
expo-camera 把这些全包了:
// screens/practice/Daily60PracticeScreen.tsx
import {
  CameraView,
  useCameraPermissions,
  useMicrophonePermissions
} from 'expo-camera';
import * as Haptics from 'expo-haptics';

export function Daily60PracticeScreen() {
  const [cameraPermission, requestCameraPermission] = useCameraPermissions();
  const [micPermission, requestMicPermission] = useMicrophonePermissions();
  const [facing, setFacing] = useState<'front' | 'back'>('front');
  const [isRecording, setIsRecording] = useState(false);
  const cameraRef = useRef<CameraView>(null);

  async function startRecording() {
    if (!cameraRef.current) return;

    try {
      setIsRecording(true);
      Haptics.impactAsync(Haptics.ImpactFeedbackStyle.Heavy);

      // Automatically stops at 60 seconds
      const video = await cameraRef.current.recordAsync({
        maxDuration: 60,
      });

      // video.uri contains the recorded video
      await handleVideoComplete(video.uri);
    } catch (error) {
      console.error('Recording failed:', error);
    }
  }

  async function stopRecording() {
    if (!cameraRef.current) return;
    cameraRef.current.stopRecording();
  }

  function toggleCameraFacing() {
    setFacing(current => current === 'front' ? 'back' : 'front');
    Haptics.selectionAsync();
  }

  // Request permissions if needed
  if (!cameraPermission?.granted || !micPermission?.granted) {
    return (
      <View>
        <Text>Camera and microphone access needed for video practice</Text>
        <Button onPress={() => {
          requestCameraPermission();
          requestMicPermission();
        }}>
          Grant Permissions
        </Button>
      </View>
    );
  }

  return (
    <View style={{ flex: 1 }}>
      <CameraView
        ref={cameraRef}
        style={{ flex: 1 }}
        facing={facing}
        mode="video"
        onCameraReady={() => console.log('Camera ready')}
      >
        <View style={styles.controls}>
          <TouchableOpacity onPress={toggleCameraFacing}>
            <FlipCameraIcon />
          </TouchableOpacity>

          <TouchableOpacity
            onPress={isRecording ? stopRecording : startRecording}
          >
            <View style={isRecording ? styles.stopButton : styles.recordButton} />
          </TouchableOpacity>
        </View>
      </CameraView>

      {isRecording && (
        <View style={styles.timer}>
          <Text>{recordingDuration}s / 60s</Text>
        </View>
      )}
    </View>
  );
}
省事的地方:
-
useCameraPermissionshook 负责权限状态管理 -
切换摄像头只需改
facing这个 prop -
recordAsync配合maxDuration,到 60 秒自动停止 -
同一套摄像头 UI 代码在 iOS 和 Android 上都能跑
换成别的方案,就得分别用 Swift 和 Kotlin 写原生摄像头代码,应付两套权限系统,维护两份代码库。expo-camera 把原本可能要一周的活压缩到了一天。
3. expo-notifications:每日练习提醒
让用户每天回来练习,对 Wellspoken 来说至关重要。我需要推送通知来做练习提醒,但又不想碰 APNs 配置、FCM 设置,也不想手动管理 device token。
expo-notifications 全给处理了:
// contexts/AuthContext.tsx
import * as Notifications from 'expo-notifications';
import { Platform } from 'react-native';

// Configure notification behavior
Notifications.setNotificationHandler({
  handleNotification: async () => ({
    shouldShowAlert: true,
    shouldPlaySound: true,
    shouldSetBadge: false,
  }),
});

async function registerForPushNotifications() {
  // Android notification channel setup
  if (Platform.OS === 'android') {
    await Notifications.setNotificationChannelAsync('default', {
      name: 'default',
      importance: Notifications.AndroidImportance.MAX,
      vibrationPattern: [0, 250, 250, 250],
    });
  }

  // Request permissions
  const { status: existingStatus } = await Notifications.getPermissionsAsync();
  let finalStatus = existingStatus;

  if (existingStatus !== 'granted') {
    const { status } = await Notifications.requestPermissionsAsync();
    finalStatus = status;
  }

  if (finalStatus !== 'granted') {
    return null;
  }

  // Get the Expo push token
  const tokenData = await Notifications.getExpoPushTokenAsync({
    projectId: 'my-expo-project-id', // From app.json
  });

  return tokenData.data;
}

// In your auth flow
async function handleSignUp(email: string, password: string) {
  // ... sign up logic

  // Get push token and send to backend
  const pushToken = await registerForPushNotifications();
  if (pushToken) {
    await api.updateUser({ pushToken });
  }
}
权限引导页:
// screens/onboarding/NotificationsPermissionScreen.tsx
import * as Notifications from 'expo-notifications';

export function NotificationsPermissionScreen() {
  const [isLoading, setIsLoading] = useState(false);

  async function requestPermission() {
    setIsLoading(true);
    try {
      const { status } = await Notifications.requestPermissionsAsync();

      if (status === 'granted') {
        const tokenData = await Notifications.getExpoPushTokenAsync({
          projectId: 'my-expo-project-id',
        });

        // Send token to backend
        await api.updatePushToken(tokenData.data);

        // Navigate to next screen
        navigation.navigate('OnboardingComplete');
      }
    } finally {
      setIsLoading(false);
    }
  }

  return (
    <View>
      <Text>Stay consistent with daily reminders</Text>
      <Text>
        We'll send you a gentle reminder each day to practice.
        You can customize the time in settings.
      </Text>

      <Button onPress={requestPermission} disabled={isLoading}>
        Enable Notifications
      </Button>

      <Button onPress={() => navigation.navigate('OnboardingComplete')} variant="ghost">
        Skip for now
      </Button>
    </View>
  );
}
好在哪:
-
getExpoPushTokenAsync()给你一个通用 token,iOS 和 Android 都能用 -
不用管 APNs 证书,也不用配 FCM
-
Expo 的推送服务负责把通知路由到对应平台的复杂逻辑
-
权限请求在各平台上统一处理
后端这边,我只要拿着 token 往 Expo 的推送 API 发通知,Expo 会自动路由到 APNs 或 FCM。不用为 iOS 和 Android 的推送通知各维护一套代码。
4. expo-secure-store:保护用户 token
我需要安全地存储认证 token。AsyncStorage 存非敏感数据没问题,但认证 token 应当加密落盘。
expo-secure-store 让这件事变得极其简单:
// contexts/AuthContext.tsx
import * as SecureStore from 'expo-secure-store';
import AsyncStorage from '@react-native-async-storage/async-storage';

const TOKEN_KEY = 'token';

export function AuthProvider({ children }: { children: React.ReactNode }) {
  const [user, setUser] = useState<User | null>(null);
  const [isLoading, setIsLoading] = useState(true);

  // Load user and token on app start
  useEffect(() => {
    async function loadUserFromStorage() {
      try {
        const userData = await AsyncStorage.getItem('user');
        const token = await SecureStore.getItemAsync(TOKEN_KEY);

        if (userData && token) {
          const parsedUser = JSON.parse(userData);
          setUser(parsedUser);
          // Verify token is still valid, configure services...
        }
      } catch (error) {
        console.error('Failed to load user:', error);
      } finally {
        setIsLoading(false);
      }
    }

    loadUserFromStorage();
  }, []);

  async function signIn(email: string, password: string) {
    try {
      const response = await api.signIn(email, password);

      // Store user data in AsyncStorage (non-sensitive)
      await AsyncStorage.setItem('user', JSON.stringify(response.user));

      // Store token securely (encrypted on device)
      await SecureStore.setItemAsync(TOKEN_KEY, response.token);

      setUser(response.user);
    } catch (error) {
      console.error('Sign in failed:', error);
      throw error;
    }
  }

  async function signOut() {
    try {
      // Clear user data
      setUser(null);
      await AsyncStorage.removeItem('user');
      await SecureStore.deleteItemAsync(TOKEN_KEY);
    } catch (error) {
      console.error('Sign out failed:', error);
    }
  }

  return (
    <AuthContext.Provider value={{ user, signIn, signOut, isLoading }}>
      {children}
    </AuthContext.Provider>
  );
}
比 AsyncStorage 强在哪:
-
iOS(Keychain)和 Android(EncryptedSharedPreferences)上的加密存储
-
和 AsyncStorage 一样简单的 API:
getItemAsync、setItemAsync、deleteItemAsync -
按平台自动加密,无需任何配置
-
Token 在应用更新和重启后依然保留
-
用户数据(姓名、邮箱、偏好设置)我用 AsyncStorage,auth token 则只用 SecureStore
API 简单到从 AsyncStorage 迁移到 SecureStore 只花了大约 5 分钟。改一下 import,加密就白送了。
5. expo-haptics:无处不在的触觉反馈
这听起来可能微不足道,但触觉反馈让 Wellspoken 的质感提升了一大截。我在整个应用里都用它,让用户的操作得到触觉上的确认。
import * as Haptics from 'expo-haptics';

// Light tap for UI selections
function handleSelection() {
  Haptics.selectionAsync();
  // Continue with selection logic...
}

// Medium impact for button presses
function handleButtonPress() {
  Haptics.impactAsync(Haptics.ImpactFeedbackStyle.Medium);
  // Continue with button action...
}

// Heavy impact for important actions (recording start)
function handleRecordingStart() {
  Haptics.impactAsync(Haptics.ImpactFeedbackStyle.Heavy);
  // Start recording...
}

// Success notification for completions
function handleExerciseComplete() {
  Haptics.notificationAsync(Haptics.NotificationFeedbackType.Success);
  // Show completion UI...
}

// Error notification
function handleError() {
  Haptics.notificationAsync(Haptics.NotificationFeedbackType.Error);
  // Show error message...
}
我用触觉反馈的地方:
-
每一次按钮点击
-
录音开始/停止
-
获得 XP 和升级
-
下拉刷新
-
相机交互
-
导航手势
这是个很小的细节,但它让应用感觉响应及时、每个反馈都有意为之。API 极其简单——每个交互只要一行代码——而且在各种设备上表现一致。
6. 用 EAS Update 快速迭代
上线之后,我在 onboarding 流程里发现了一个 bug。放在过去,我得先修复、重新构建、提交到两个应用商店、等 2-3 天审核,然后再等用户更新。有了 EAS Update,我 15 分钟就修好并推送了更新。
app.json 中的配置:
{
  "expo": {
    "name": "Wellspoken",
    "slug": "wellspoken",
    "version": "x.x.x",
    "runtimeVersion": "x.x.x",
    "updates": {
      "url": "https://u.expo.dev/my-expo-project-id"
    },
    "extra": {
      "eas": {
        "projectId": "my-expo-project-id"
      }
    }
  }
}
eas.json 设置:
{
  "build": {
    "production": {
      "channel": "production",
      "distribution": "store"
    },
    "preview": {
      "channel": "preview",
      "distribution": "internal"
    }
  }
}
推送更新:
# Fix a bug, then push OTA update
eas update --branch production --message "Fix onboarding flow bug"

# Users get the update on next app restart
# No app store submission needed
就这样。不用重新编译,不用提交应用商店。更新立即生效,用户下次重启应用就能拿到。
我给 preview 和 production 分了不同的 channel,这样就能在推给所有用户之前先测试更新。这在头几天救了我好几次——小的 UI bug、文案改动,还有测试时没覆盖到的边界情况。
7. 我用到的其他 Expo 模块
expo-video - 用 useVideoPlayer hook 回看 Daily 60 的录制视频。
expo-file-system - 把录制的音频和视频文件上传到 S3。简单的文件操作,不用碰原生代码。
expo-apple-authentication——接入 Apple 登录大约花了 30 分钟。
expo-image-picker——从相册里选视频,用于 Daily 60 练习。
expo-font——用 @expo-google-fonts/manrope 加载自定义的 Manrope 字体。
这些全都不用改任何原生配置,装好就能用。这就是 Expo 托管工作流的威力。
应用采用情况与收入
上线一个月后的早期数据:
-
400+ 用户
-
收入 500+ 美元
-
上线 24 小时内就有了第一个付费用户
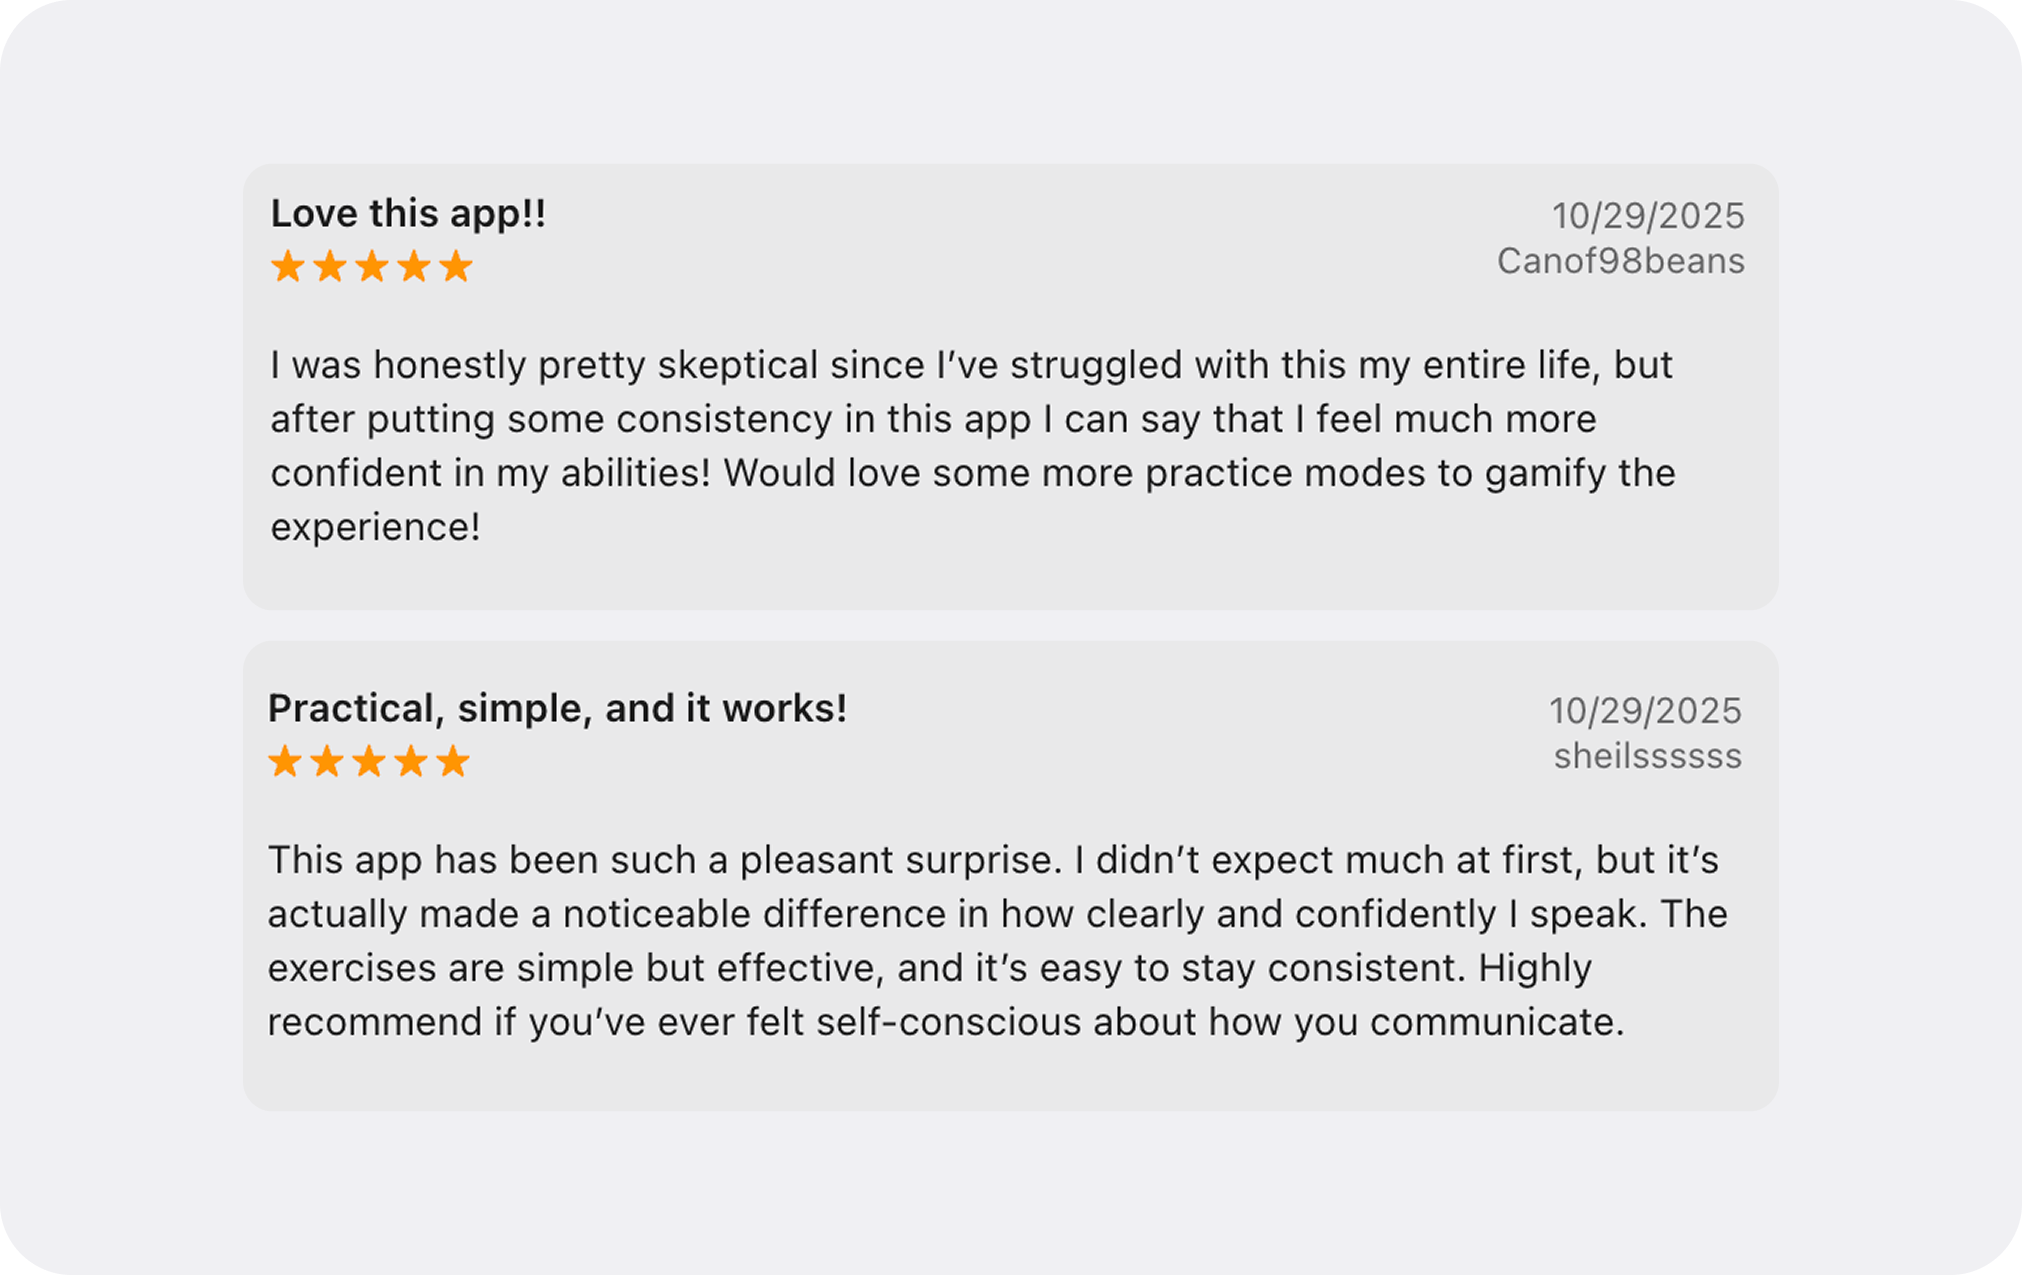
快速上线很关键。我得以迅速验证想法,开始收集真实用户反馈,并根据实际使用情况而不是假设来迭代。OTA 更新意味着我可以实时修问题,不用等应用商店审核。顺便说一句,用户评价非常鼓舞人心:
用 Expo 开发学到的东西
Expo 的 SDK 已经可以用于生产。 我一开始担心音频/视频录制或相机功能会碰到限制,但 expo-audio 和 expo-camera 满足了我的全部需求。API 干净、文档齐全,在各平台上表现一致。
推送通知不再痛苦。 expo-notifications 把 APNs 和 FCM 配置的复杂度全部抹掉了。拿到推送 token 并发出通知,总共大概 30 分钟,而不是花几个小时管理证书。
安全可以很简单。 把认证 token 从 AsyncStorage 换成 expo-secure-store 只花了 5 分钟,两个平台就都有了加密存储。有时候最安全的方案也是最省事的方案。
从第一天就用 EAS。 我没有自己折腾构建流程、之后再迁移,而是一开始就用 EAS Build、Update 和 Submit,省下了好几个小时的基础设施工作。
基于 Hook 的 API 对 React 开发者很友好。 useAudioRecorder、useAudioPlayer、useCameraPermissions——从 React 过来用这些感觉很自然。没有奇怪的命令式 API,也没有 class 组件。
我应该写测试的。 为了赶进度,我上线时没写任何自动化测试。应用小,所以没出大问题,但已经出现了几个回归 bug,有测试的话本可以拦住。
细节上的打磨很重要。 到处加上触觉反馈总共大概花了一个小时,但应用明显变得更有响应感、更有设计感。这些微小的处理会累积起来。
收尾
当然,产品不是 Expo 做出来的——我仍然得设计出有用的东西,写出干净的代码。但它清掉了移动开发通常伴随的所有摩擦。不用管证书,不用处理平台特有的构建问题,简单的修复也不用等上好几天。
对于想快速交付的独立开发者来说,Expo 是显而易见的选择。它让你专注于做出人们愿意用的东西,而不是跟工具链较劲。
应用现在已经上线。如果你和我一样在表达上有困难,或者你对实现方式感兴趣,可以去看看,或者直接来问。