Posh はいかにして Expo で毎週の手動リリースから継続的デリバリーへ移行したか
PoshがモバイルCI/CDパイプラインを再構築し、手動リリースのボトルネックを解消、アプリはApp Storeエンターテインメント部門で首位に。
日本語
コピー

本記事は Posh の founding engineer、David Davidov によるゲスト投稿です。Posh はリアル体験のためのソーシャルマーケットプレイスで、主催者がイベントを通じてコミュニティを立ち上げ、拡大し、収益化するのを支援しています。
…
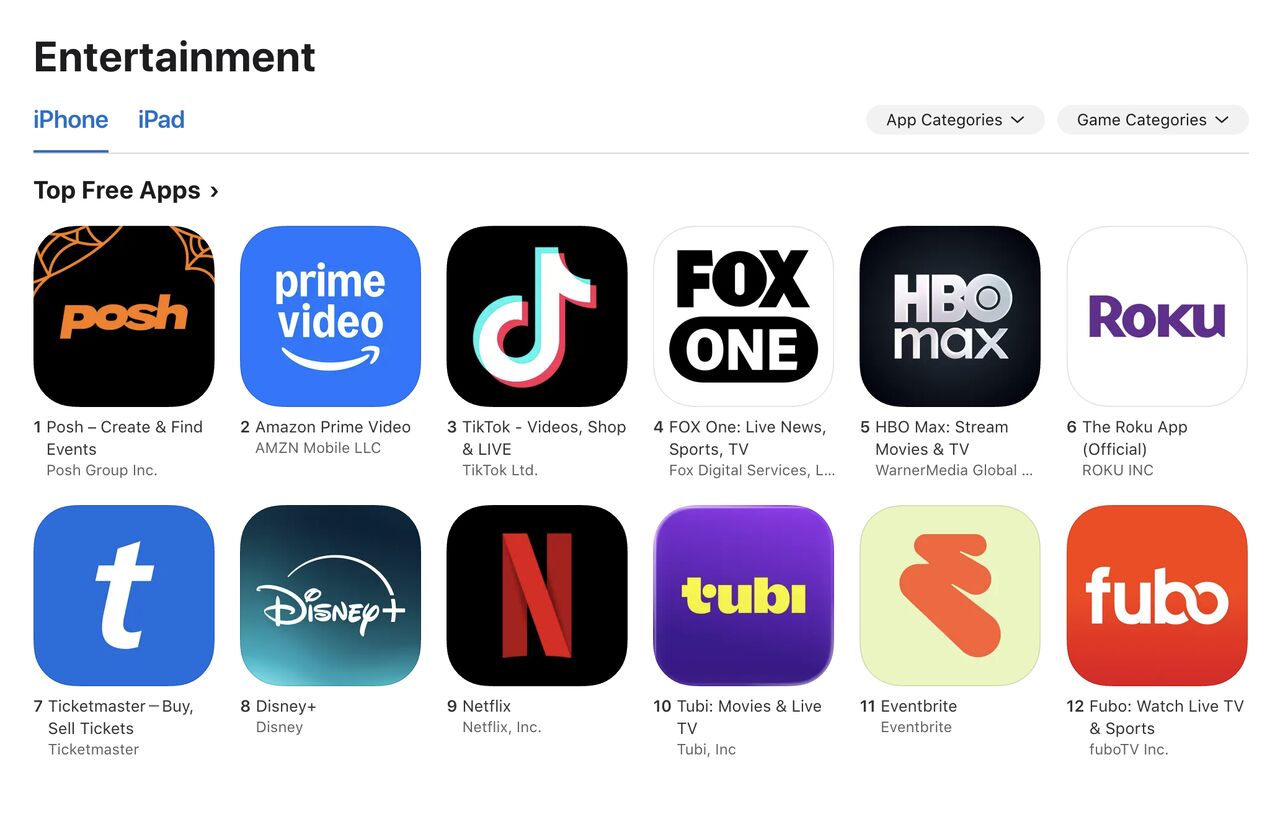
長いアプリレビュー期間と時間に追われる手動リリースを経て、私たち Posh チームはモバイルの CI/CD パイプラインを再構築し、手作業を可能な限り排除しました。背景を説明します。私たちのアプリは iOS と Android で数百万人のユーザーに利用されており、リリースを安全かつ確実に、予定どおりアプリストアへ届けることが常に最優先事項でした。この投資は実を結び、リリース速度の向上が成長を後押しし、アプリは一時 App Store のエンターテインメント部門ランキングで1位を獲得しました。
痛みを見つける
2年ちょっと前、うちのモバイルアプリを開発し始めたときから、アプリストア経由の手動リリースがずっと嫌だった。チームはExpo Updatesの存在はずっと前から知っていたけど、fingerprintingとEAS Workflowsのプリセットタスクが出てくるまでは、OTA更新の自動化はどうもしっくりこなかった。壊れる余地が大きすぎた。この2年間でぶつかった痛みはこんな感じだ。
-
Linearのタスクがどのアプリバージョンでリリースされたのか分からない。
-
毎週Release Trainの担当者をローテーションして、その週の変更をリリースしてもらう ← 最大のボトルネック
-
E2Eテストをリリースフローに自動で組み込む
-
ビルドとコミットのトリガーを不安定なGitHub Actionsに頼らざるを得ず、維持コストが高い
-
あるエンジニアのPRが新しいネイティブ変更を持ち込んだのか判断しづらい
こういう痛みのせいで、モバイル開発は創造的でテンポの速い体験ではなく、ただの苦役になっていた。
fingerprinting、workflows、OTA更新まわりのExpoの進化を調べ直したうえで、リリースシステムをゼロから設計し直すことにした。可能な限り自動化しつつ、本当に重要なところだけ手動承認を残す方針だ。この自動化のおかげで、毎週の手動リリースから、ストアリリースはほぼ月1回、OTA更新は週に何度も、という運用に変わった。
解決したかったこと
-
PRで入ってくる変更をより簡単にインストールしてテストできるようにし、同時にそのPRが新しいネイティブ変更を含むかどうかも判断できるようにする
-
EASビルドを過剰に発火させない仕組み。テストを始める準備ができたときだけビルドする
-
OTA更新を丁寧に導入し、staging環境でテストする機会を確保する。masterにマージされた変更が自動で本番にデプロイされてはいけない!
-
新しいバージョンブランチを作る頻度を減らし、ネイティブ変更がmasterに入ったときだけ新しいブランチを切る
-
チームへの通知まわりを自動化する。新しいバージョンがいつ本番に出たのか、そのバージョンにどの変更が含まれるのか
以下、どうやってリリースに費やす時間を減らしたかを書いていく。そのまま真似してもらって構わない。
前提条件
まずBetoのこの動画を見るのをおすすめする。アプリ環境をどう分割するかという話で、更新チャンネルやアプリ環境を設定するときに効いてくる。このチュートリアルを見終われば、同じデバイスにdevelopment、preview/staging、productionの3つのビルドを同時に入れられるようになっているはずだ。テストもずっと楽になる。ビルドを切り替えるだけで済むから。
プロジェクトにExpo UpdatesとExpo Fingerprintsを設定しておくこと。
自動化その1:PRプレビューの設定
これはCI/CDフローに必須ではないけど、チームが変更を素早くレビューするのに役立つ。特にagentをよく使うチームならなおさらだ。
この記事を読んで触発され、PRにQRコードをコメントするEAS workflowを作った。スキャンすれば今回の変更をdevelopmentアプリにインストールできる。コードの細かい話は省くが、このworkflowで変えた点だけ挙げておく。
-
fingerprintが見つからなければビルドしない(developmentにOTAできない)。無理にビルドするのはクォータの無駄だと思う。将来agentに依存パッケージを自動更新させたくなったら、このロジックは変えるかもしれない。
-
ネイティブコードを持ち込むPRには
needs new buildラベルを付ける。純粋にGitHubでPRを絞り込むためだ。先を読めば分かるけど、私はラベルを使うのが結構好きだ。 -
Expoのサンプルにあったコメントはかなりカスタマイズした。操作説明、現在のfingerprintでの直近のビルドへのリンク、トラブルシューティング手順を追加し、QRコードも拡大した。見逃しようがないくらいに 😆
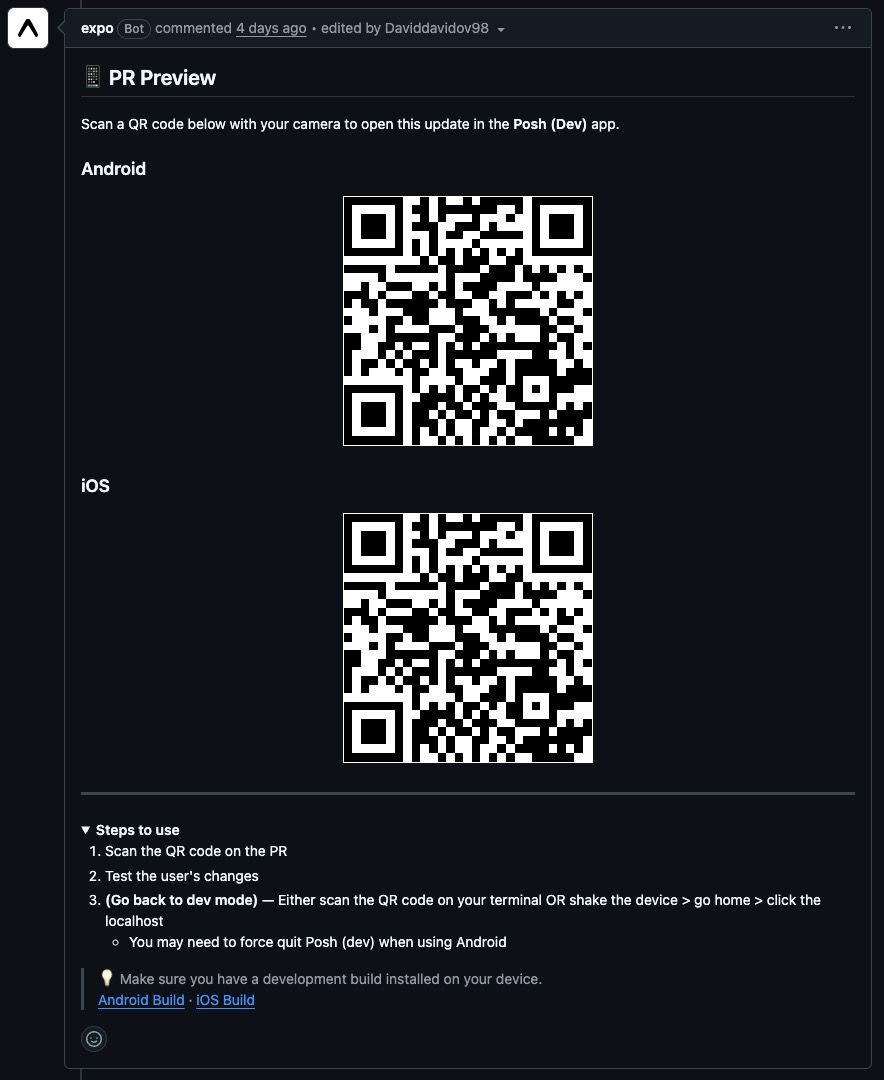
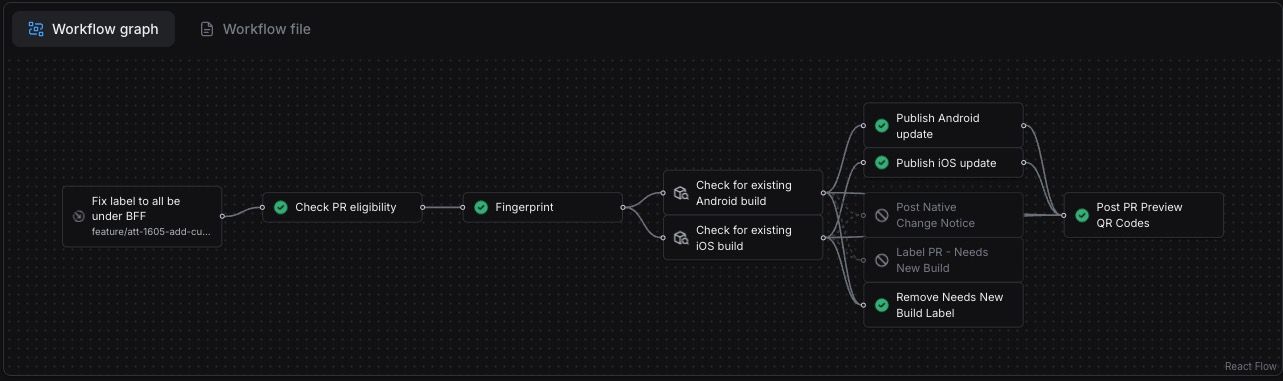
Devin や Claude にアプリの特定箇所のコードを修正してもらったとき、すぐにちらっと見て、何が変わったのかを視覚的に確認できるようになった。レビューもリリースも、いつでもどこでも 🏃♂️✨
自動化 2:OTA ブランチ
いくつかの PR を master にマージしたとする。その PR を一切テストせずに本番環境へデプロイしたいとは思わない。OTA ブランチを作れば、PR ごとに OTA 更新をトリガーするのではなく、複数の変更をまとめて一度に OTA できる。
OTA ブランチには 2 つのワークフローが必要だ。
1 つは master/main ワークフロー。用途は次のとおり:
-
現在のアプリバージョンの下に OTA ブランチを開く。オプションの
OTA branchラベルを付けられる。例えば8.0.0 OTA #1- ラベルがあると PR を絞り込みやすくなる ✨
-
OTA ブランチがすでに存在する場合は、master に rebase する
-
新たに取り込まれた PR のタイトルと issue 番号を、その PR 内の changelog に自動で書き込む
-
OTA ブランチが master にマージされたら、本番環境への EAS Update を 1 回トリガーする
-
master/main ワークフローはさらに拡張していく。最終的な master ワークフローの姿は最後の節で概説する
もう 1 つのワークフローは OTA ブランチへの push ごとに実行され、内容は次のとおり:
- OTA を preview 環境に公開する
おおよそこんな感じだ:
name: OTA Preview

on:
  push:
    branches: ['ota_update_*']

jobs:
  fingerprint:
    name: Fingerprint
    type: fingerprint
    environment: preview

  publish_preview_android:
    name: Publish Android preview OTA
    needs: [fingerprint]
    type: update
    environment: preview
    params:
      platform: android
      branch: preview

  publish_preview_ios:
    name: Publish iOS preview OTA
    needs: [fingerprint]
    type: update
    environment: preview
    params:
      platform: ios
      branch: preview
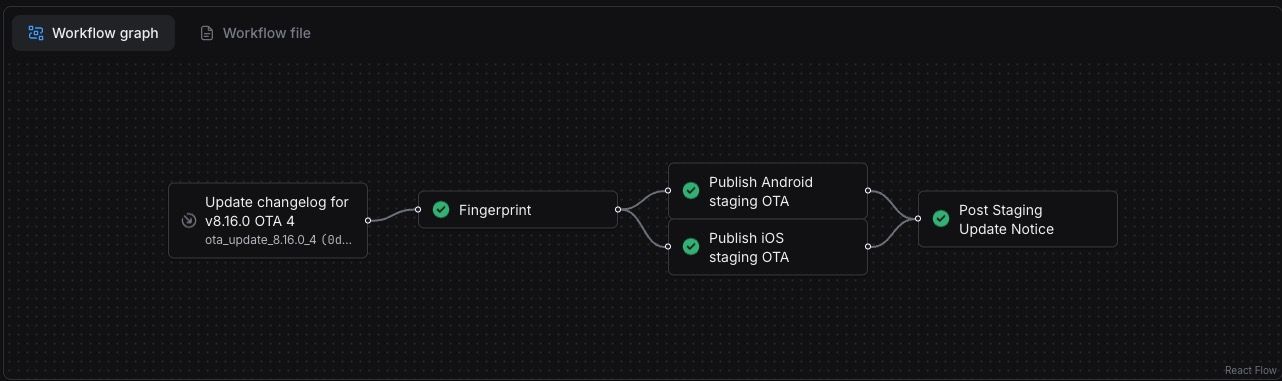
OTA ブランチの diff には changelog の更新だけが含まれるべきです。こんなふうに:
## v8.15.1 OTA 1 (2026-04-13)

- Sample JS Changes white again #166
- Sample JS Changes green again #165
- Sample JS Changes #163
- Sample JS Changes #161
- Sample JS Changes #160
- Sample JS Changes #158

## v8.15.1 (older version)
changelog を最後の自動化フローでどう使うかは、後で話します。
自動化 3:バージョンブランチ
ネイティブの変更を含む PR をマージしたとします。このとき、進行中の OTA ブランチをすべて閉じるか無効化し、代わりにバージョンブランチを新しく作ってほしい。このブランチは本番環境にデプロイするまで残ります。アプリストアで新しいバージョンを出す必要があるかどうかをエンジニアリングチームが判断するとき、よりどころはこれだけです。
OTA ブランチと同じく、バージョンブランチにも 2 つのワークフローがあります:
master ワークフローを拡張して、新しいネイティブの変更を扱えるようにする。
-
OTA ブランチが存在するなら閉じ、
Version Branchタグの付いたバージョンブランチを新しく作る- モバイルアプリの
package.jsonバージョン番号を自動でインクリメントする
- モバイルアプリの
-
バージョンブランチがすでにあるなら、master に rebase し、OTA ブランチと同じように changelog を更新する
手動で build & submit bundles タグを付けたときに起動するワークフロー
-
これにより、チームが出荷の準備ができたときだけアプリストアに提出される
-
Expo が事前にパッケージしたワークフローコマンドでビルドし、staging track に提出する
-
両方のストアが新しい bundle を検知したら、エンドツーエンドテスターを自動でビルドに招待する
-
提出が完了したら、Slack でエンドツーエンドテスターにテスト開始を通知する
おおよそこんな感じです:
name: Version Branch Builds

on:
  pull_request:
    types: [labeled]

concurrency:
  cancel_in_progress: true
  group: ${{ workflow.filename }}-${{ github.ref }}

jobs:
  build_production_android:
    name: Build Production Android
    if: ${{ github.event.label.name == 'build and submit' }}
    type: build
    environment: production
    params:
      platform: android
      profile: production

  build_production_ios:
    name: Build Production iOS
    if: ${{ github.event.label.name == 'build and submit' }}
    type: build
    environment: production
    params:
      platform: ios
      profile: production

  build_preview_android:
    name: Build Preview Android
    if: ${{ github.event.label.name == 'build and submit' }}
    type: build
    environment: preview
    params:
      platform: android
      profile: preview

  build_preview_ios:
    name: Build Preview iOS
    if: ${{ github.event.label.name == 'build and submit' }}
    type: build
    environment: preview
    params:
      platform: ios
      profile: preview

  build_development_android:
    name: Build Development Android
    if: ${{ github.event.label.name == 'build and submit' }}
    type: build
    environment: development
    params:
      platform: android
      profile: development

  build_development_ios:
    name: Build Development iOS
    if: ${{ github.event.label.name == 'build and submit' }}
    type: build
    environment: development
    params:
      platform: ios
      profile: development

  submit_production_android:
    name: Submit Production Android
    needs: [build_production_android]
    type: submit
    environment: production
    params:
      build_id: ${{ needs.build_production_android.outputs.build_id }}
      profile: production

  submit_production_ios:
    name: Submit Production iOS
    needs: [build_production_ios]
    type: submit
    environment: production
    params:
      build_id: ${{ needs.build_production_ios.outputs.build_id }}
      profile: production

  submit_preview_android:
    name: Submit Preview Android
    needs: [build_preview_android]
    type: submit
    environment: preview
    params:
      build_id: ${{ needs.build_preview_android.outputs.build_id }}
      profile: preview

  submit_preview_ios:
    name: Submit Preview iOS
    needs: [build_preview_ios]
    type: submit
    environment: preview
    params:
      build_id: ${{ needs.build_preview_ios.outputs.build_id }}
      profile: preview

  notify_testers:
    name: Notify QA Team
    needs: [build_preview_android, build_preview_ios, submit_preview_android, submit_preview_ios]
    environment: preview
    steps:
      - name: Send Slack message
        run: |
          # Notify your QA team that new preview builds are available.
          # Include whatever your team needs, such as build numbers,
          # install links, release notes, or testing instructions.

  comment_builds:
    name: Post Build Links
    needs:
      [
        build_production_android,
        build_production_ios,
        build_preview_android,
        build_preview_ios,
        build_development_android,
        build_development_ios,
      ]
    environment: production
    steps:
      - name: Post comment on PR
        run: |
          # Post a PR comment with links to the generated EAS builds.
          # The implementation depends on how your CI environment exposes
          # repository, pull request, and authentication context.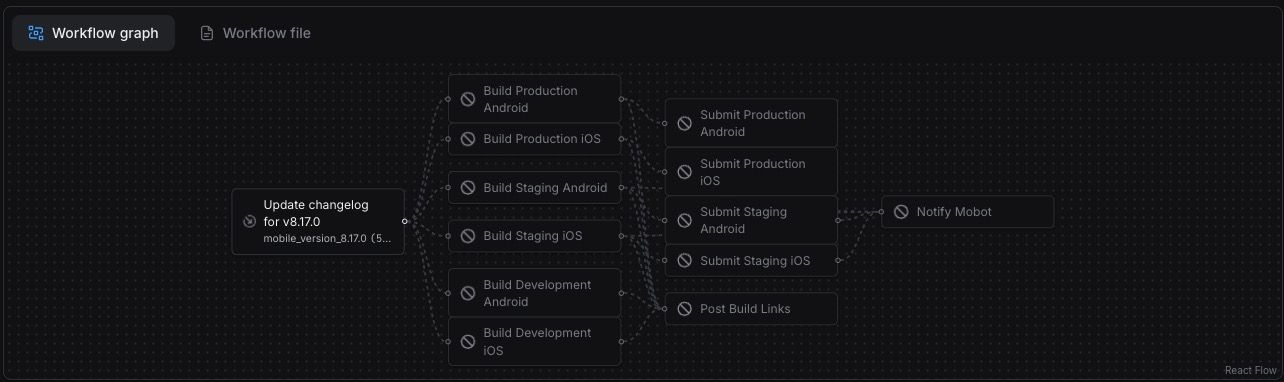
これで PR には changelog の変更と、モバイルアプリの package.json 新しいバージョン番号の更新が含まれるはずです。
ここまでくると、手作業で残るのはアプリレビューの申請とリリースボタンを押すことだけです。このステップは自動化すべきではないと考えています。bundle の更新以外にもさまざまな変更が絡む可能性があるからです。
自動化 4:メインワークフロー
この段階で、メインワークフローが担うべきは次のとおりです。
-
PR がマージされたら、OTA ブランチを作成して rebase する
-
PR がマージされたら、バージョンブランチを作成して rebase する/重複する OTA ブランチを閉じる
-
OTA ブランチまたはバージョンブランチがマージされたら、GitHub 上で新しい release を作成する
name: Production Deploy

on:
  push:
    branches: ['main']

concurrency:
  cancel_in_progress: true
  group: ${{ workflow.filename }}-${{ github.ref }}

jobs:
  fingerprint:
    name: Fingerprint
    type: fingerprint
    environment: production

  get_android_build:
    name: Check Android build
    needs: [fingerprint]
    type: get-build
    params:
      fingerprint_hash: ${{ needs.fingerprint.outputs.android_fingerprint_hash }}
      profile: production

  get_ios_build:
    name: Check iOS build
    needs: [fingerprint]
    type: get-build
    params:
      fingerprint_hash: ${{ needs.fingerprint.outputs.ios_fingerprint_hash }}
      profile: production

  create_release:
    name: Create GitHub Release
    needs: [fingerprint]
    if: ${{ contains(github.event.head_commit.message, 'app_version_') }}
    environment: production
    steps:
      - uses: eas/checkout
      - name: Create release
        # run a scripts to create a GH release using their API

  publish_production_android:
    name: Publish Android production OTA
    needs: [get_android_build, get_ios_build]
    if: >-
      ${{ contains(github.event.head_commit.message, 'ota_update_')
          && needs.get_android_build.outputs.build_id
          && needs.get_ios_build.outputs.build_id }}
    type: update
    environment: production
    params:
      platform: android
      branch: production

  publish_production_ios:
    name: Publish iOS production OTA
    needs: [get_android_build, get_ios_build]
    if: >-
      ${{ contains(github.event.head_commit.message, 'ota_update_')
          && needs.get_android_build.outputs.build_id
          && needs.get_ios_build.outputs.build_id }}
    type: update
    environment: production
    params:
      platform: ios
      branch: production

  update_release:
    name: Update GitHub Release
    needs: [get_android_build, get_ios_build]
    if: >-
      ${{ contains(github.event.head_commit.message, 'ota_update_')
          && needs.get_android_build.outputs.build_id
          && needs.get_ios_build.outputs.build_id }}
    environment: production
    steps:
      - uses: eas/checkout
      - name: Update release with OTA changelog
        run: bash scripts/workflows/update-release.sh

  create_ota_pr:
    name: Manage OTA PR
    needs: [fingerprint, get_android_build, get_ios_build]
    if: >-
      ${{ needs.get_android_build.outputs.build_id
          && needs.get_ios_build.outputs.build_id
          && !contains(github.event.head_commit.message, 'ota_update_')
          && !contains(github.event.head_commit.message, 'app_version_') }}
    environment: production
    steps:
      - uses: eas/checkout
      - name: Create OTA branch and PR
        run: |
          # run a script to create an OTA branch and PR incremented from the last one created from the current version

  manage_version_pr:
    name: Manage Version Branch PR
    needs: [get_android_build, get_ios_build]
    if: >-
      ${{ !contains(github.event.head_commit.message, 'ota_update_')
          && !contains(github.event.head_commit.message, 'app_version_') }}
    environment: production
    steps:
      - uses: eas/checkout
      - name: Manage version branch and PR
        run: |
          # run a script to create an Version branch and PR incremented from the last one created from the current version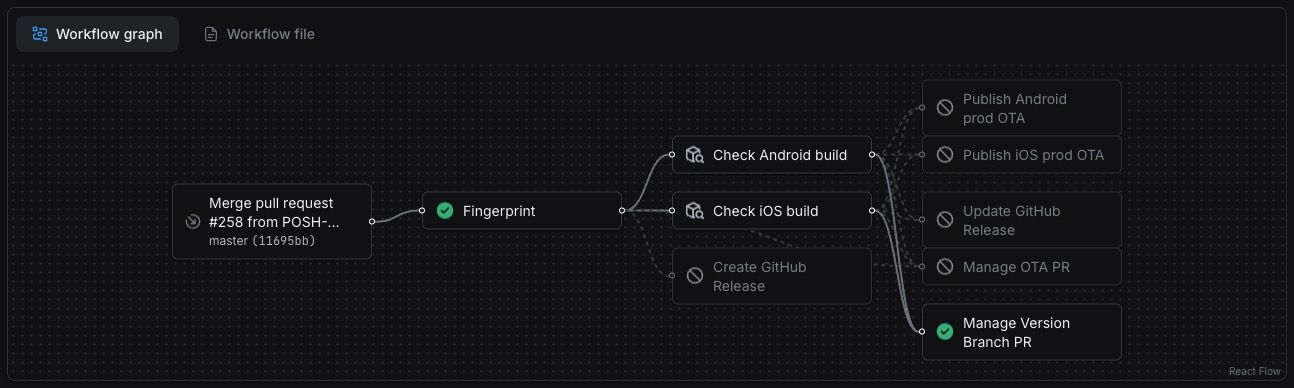
自動化 5:チームへの通知
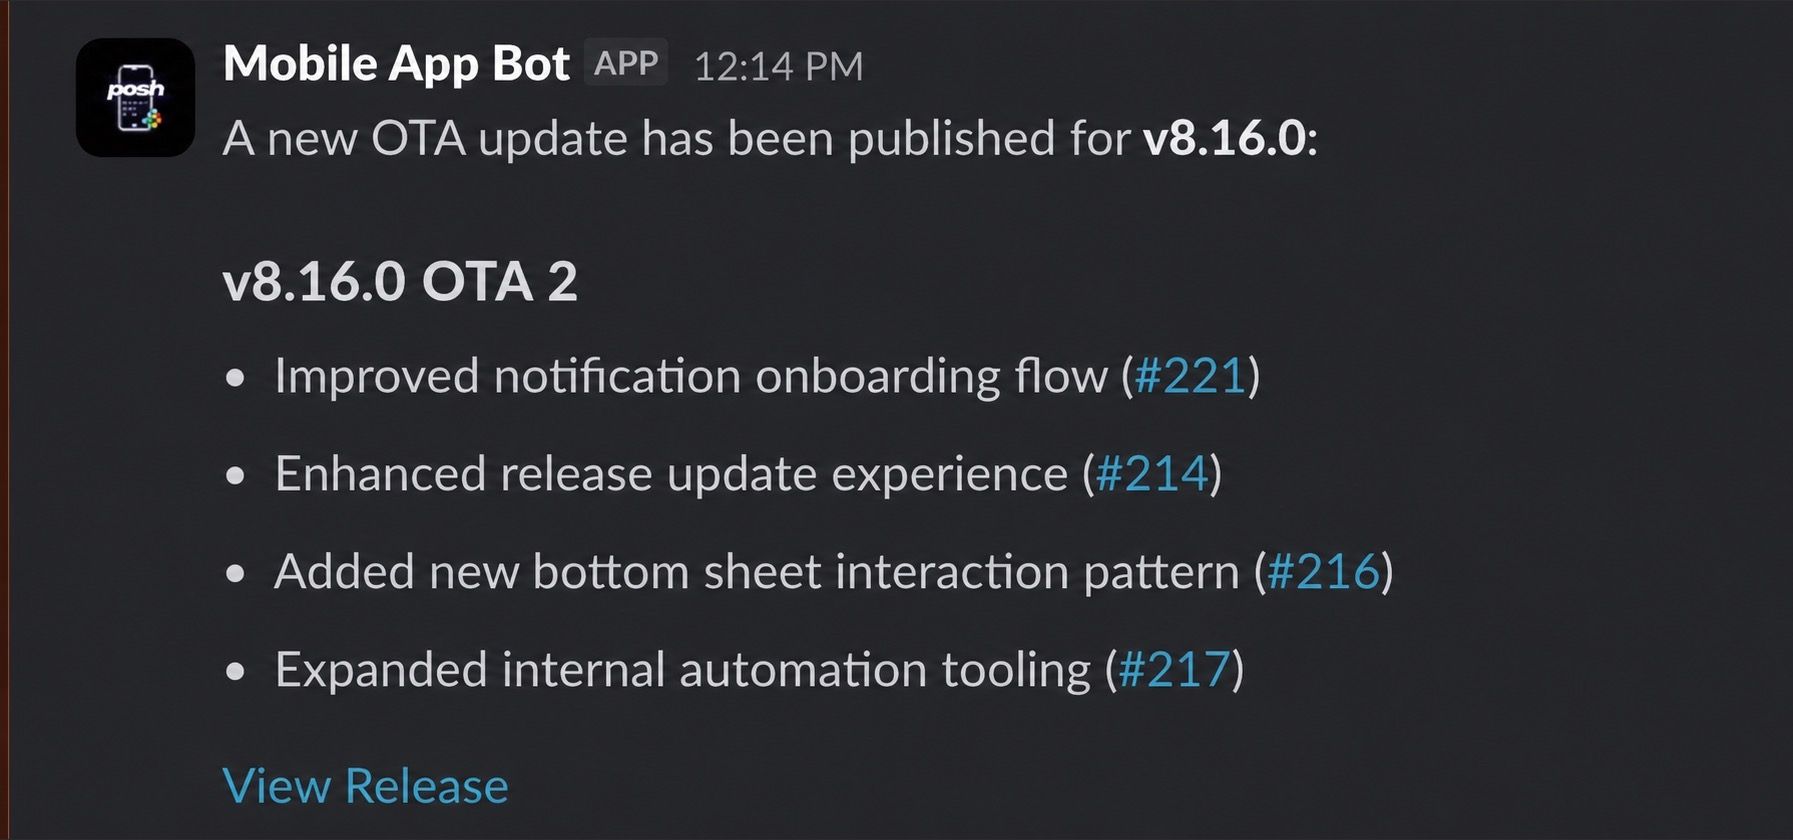
OTA またはバージョンブランチのマージが完了すると、各ブランチが自動生成した changelog を使ってリポジトリに GitHub release を作成します。さらに、release の公開をトリガーに動く GitHub Action を用意しました。この Action の処理は次のとおりです。
-
チームの Slack チャンネルに、新しい変更がデプロイされたことを知らせるメッセージを投稿する
-
そのバージョンにマージされた変更に紐づく Linear のチケットをすべて洗い出し、バージョン番号のラベルを付ける
name: Release Slack Notification

on:
  release:
    types: [published]

jobs:
  notify:
    name: Post Release to Slack
    runs-on: ubuntu-latest
    steps:
      - name: Send release to Slack
        run: |
          # Build and send a Slack message for the published release.
          # Find all the Linear issues completed in this release and add a version label to them using Linear's API
          # Include whatever your team needs, such as the release tag,
          # changelog, links to pull requests, or the release URL.
この OTA やネイティブの変更で動いたタスクに対して何をするかは自由です。私たちの場合は、Slack にメッセージを送って変更の配信開始をチームに知らせ、Linear で最近リリースされた issue に新しいバージョンラベルを付けています。
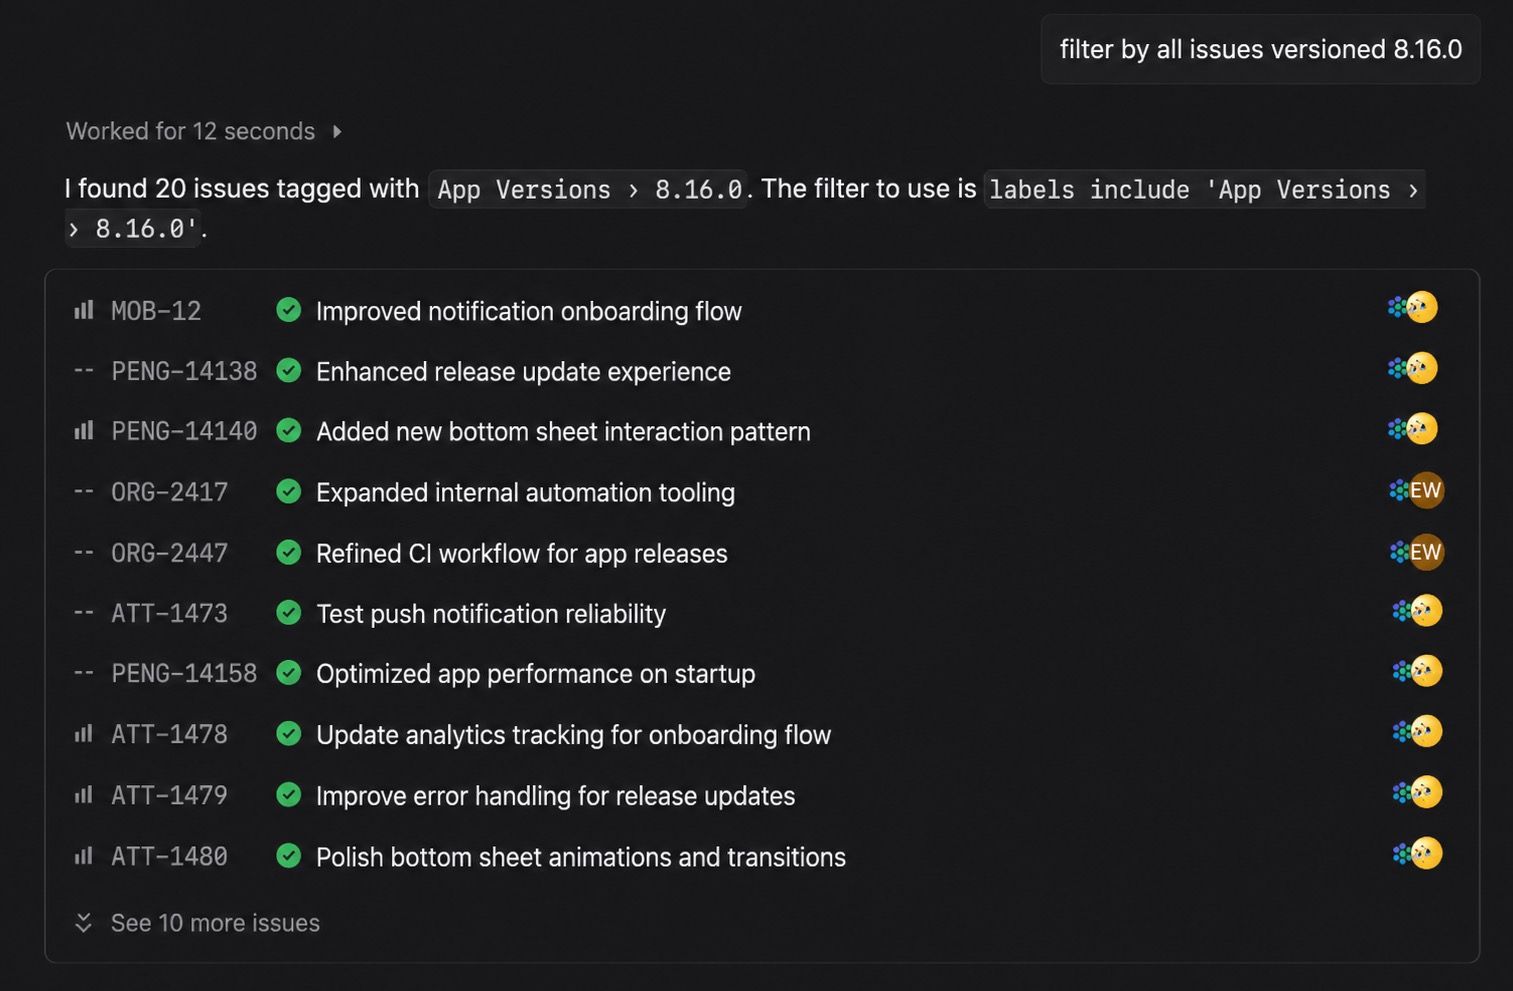
今や組織の誰もが、リリース済みバージョンで issue をシームレスに絞り込める。PM とサポートチームにとっては特にありがたい。これでリリースサイクルは OTA 更新とネイティブ更新の両方で閉じた。繰り返すが、モバイルアプリにおいて MERGED ≠ DEPLOYED だ。
結びに
このワークフローを導入してから、OTA ブランチとバージョンブランチの作成・管理は完全に自動化された。staging 環境という安全網を通しつつ、ビルドを無駄に走らせることもない。モバイルエンジニアの私たちは、app のバージョン番号をどう上げるかに悩む必要も、部門をまたいだ調整——新しい変更がいつ app に届くかを伝える作業——に追われることも、誤った OTA を数百万ユーザーに配信してしまう不安 😰 からも解放された。
ひとつ言っておくと、Expo Workflows と fingerprinting がなければ、これを組み上げるのはかなり苦しかった。
Expo とその絶え間ない開発者体験の改善は、私たちが App Store のエンタメ部門で1位を取れた鍵のひとつだ。
このパイプラインは今後も伸ばしていく。改善できる点があれば、あるいはこのガイドが役に立ったなら、いつでも連絡してほしい。